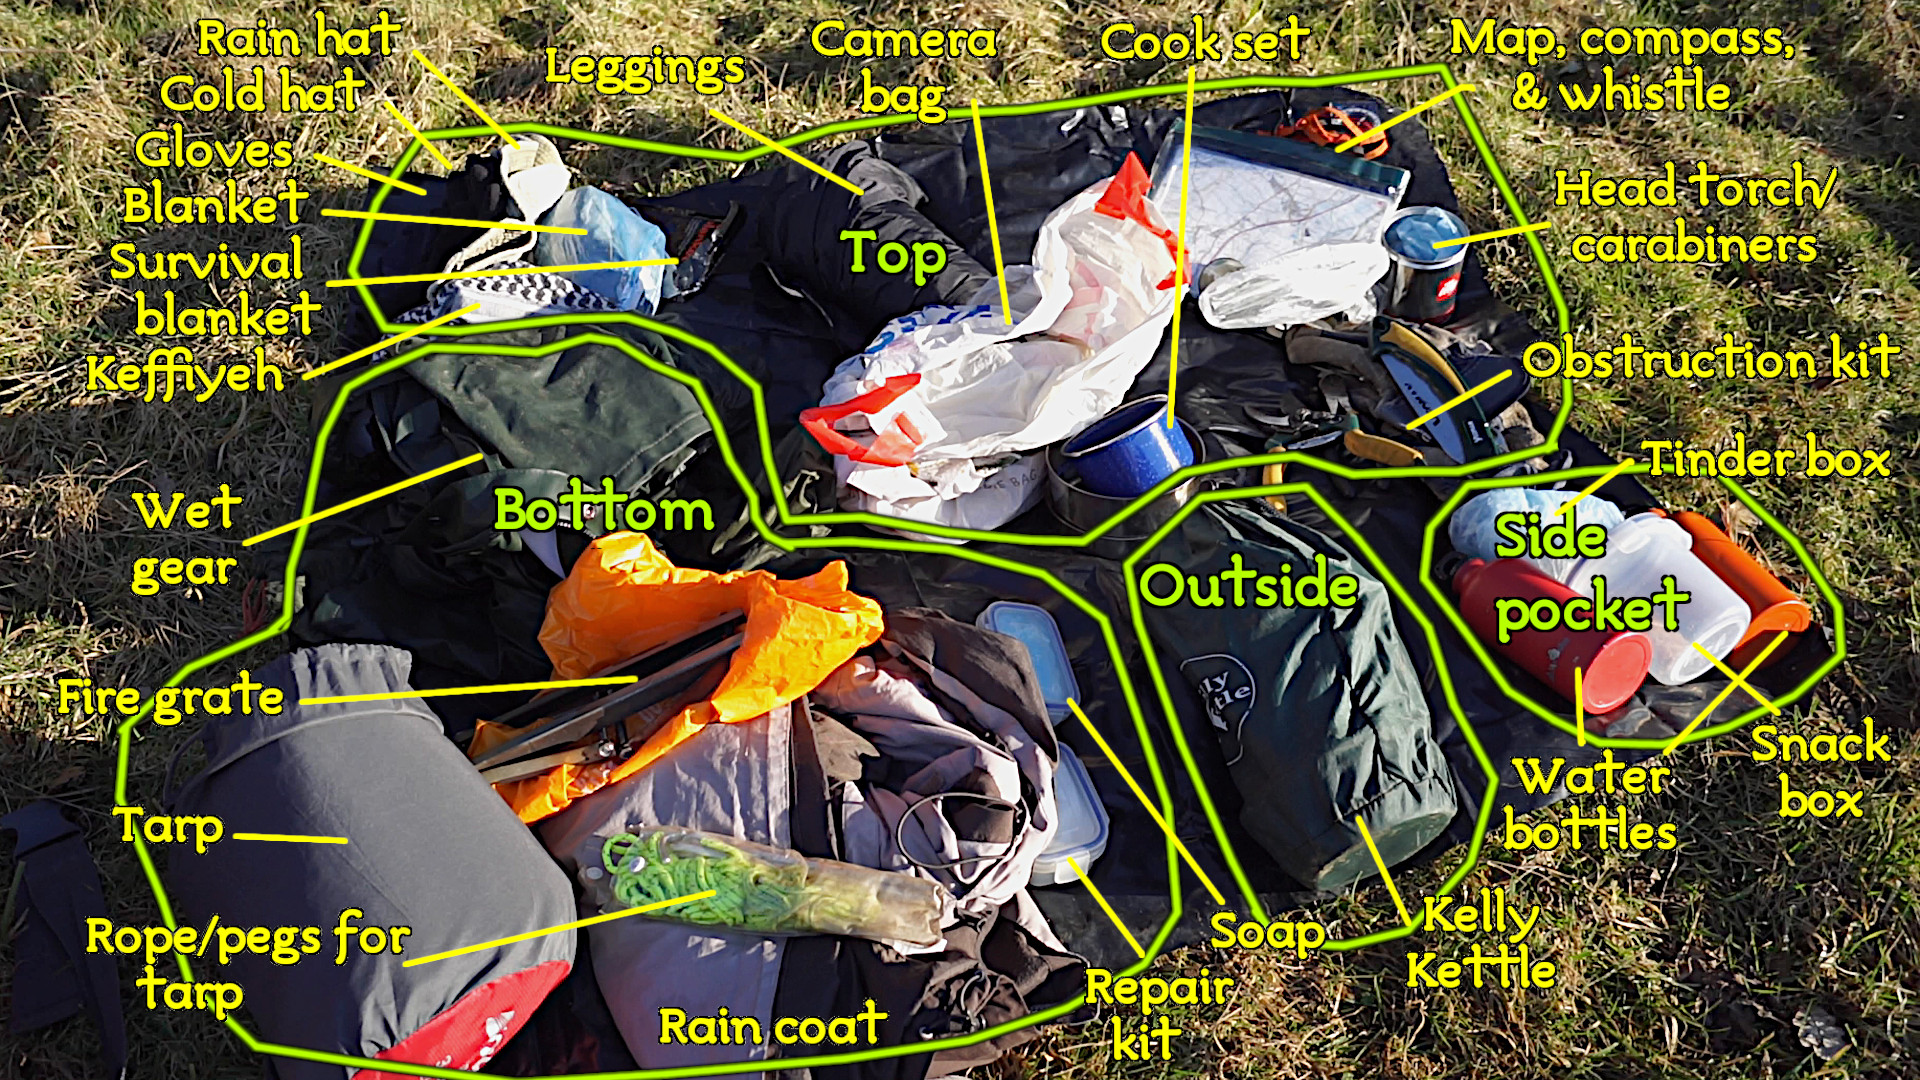
My 16kg ‘Winter’ day pack – rigged for a day’s walking & photography
‘Long Walks & Anarcho-Primitivism’, Part 2:
My Day-Pack ‘Unpacked’; what do I carry in the big bag on my back?
So many times people passing have said to me, “what have you got in that big rucksack?” In this blog post I’ll outline what it is I carry in ‘my big pack’, and a little about why I take it. Hopefully this will inspire a little reflection of the kinds of kit you might need outdoors.
What I carry varies depending on whether: It is Winter or Summer; I’m out for a few hours or an entire day; or if I’m just relaxing, foraging, or doing ‘serious’ photographic work. At the core of my pack is a collection of ‘stuff’ that I always take with me – and is always in my bag, hanging on its storage hook, ready to leave at a moment's notice.
I have been walking in the countryside for over forty years, and in that time I’ve been to every corner of the land, over many day outings, and quite a few longer ‘expeditions’. What I evolved to carry in my bag isn’t typical; and quite often isn’t useful just for me, but also for many people I meet in precarious situations along the way.
One really important thing to get absolutely clear here: What you carry has to be relevant for you, but most importantly, your body weight.
Ideally you shouldn’t carry more than a quarter of your body weight long distances or you can cause serious injury. For me, at 6-foot/180cm and weighing in at around 100 kilos, that has very different meaning to someone around the UK average of 162cm/60kg (women) to 175cm/68kg (men).
After many years of ‘practise’ I have found that walking outdoors calls upon many of the same resources, but not all the time. It’s also possible to dispense with a number of them to save weight, but you end up meeting people on ‘the way’ who don’t have that experience – and find it really useful if you can help them out.
Some of what I take is basic common sense. Other items are for my own specific pleasure – which most people wouldn’t want to take anyway.
What I hope you get from this “unpacking” of my rucksack are some ideas of the kind of kit it is useful to have outdoors.
The disgorged contents of my pack on a ground sheet. Key: Yellow, what it is; Green, where I goes in the rucksack.Click image for larger version.
I learnt to camp with nothing; literally, one of my first tents at a free festival was a big folded plastic sheet.
Over the years this ‘minimalist’ approach has given me an appreciation for ‘the basics’; things that are cheap, simple, but the possession of which makes all the difference to ‘enjoyment’ versus ‘existence’ outdoors.
Over the years I’ve also leant from many skilled ‘professionals’, from former army types hanging out in protest camps, to employed rangers or wardens teaching courses in mountain guiding and camping.
What I do here is summarise that experience by unpacking my pack (see table below), and explaining what each piece is for.
By ‘Winterised’, I mean the configuration I keep ready-packed in the rucksack to go out in the Winter. It has heavy-duty wet gear, extra clothing, and the things needed to bivvy down should I have some mishap or another. Note: Number in brackets before each item refer to the section of the text which describe it – click the number to jump to that section.
This category represents the ‘essentials’ that people should take for anything more than a simple stroll – and absolutely so if travelling any distance or to a previously unknown location.
These items will guide your way, in whatever weather, and allow you to clean or patch yourself up should your have an accident along the way.
Note that the torch/head torch option is included as standard as I often walk at dawn and dusk, and into/out of the night.
This is ‘useful’ equipment – both for ‘serious’ weather, but also more extreme locations where their remoteness requires a little extra precaution.
This category represents a transition from day-walking to ‘wild camping’ – but to do that safely in Winter requires a minimum 3-season sleeping bag & mat (weight ~2.5kg).
‘Extras’ represent my personal preferences, planned around the type of activities I like to do outdoors. That’s usually photography, food foraging, camping, and cooking over a fire.
What you might select as ‘extras’ is entirely up to you – from arts materials to musical instruments. The point is walking can facilitate such fun activities, so why not try them outdoors?
Note: ‘Weight’ represents my hoch-poch of old stuff – check the weight of whatever you use to work out your own table
An ‘anarchic’ introduction
At a glance, the list of what’s in my pack is excessive; and for many the weight alone will be a problem. But it works for me.
I mean, 3.6 kilos of camera equipment is overly heavy, but it lets me do what I need to do. Likewise, why take a Kelly Kettle and saucepan instead of a little Campingaz stove? It’s what I prefer.
Being outdoors is not about copying fashion. It’s about enabling and extending the space for your enjoyment and personal creativity. There is no ‘right way’ to do that; or to put it more Crass-ly1, “there is no authority but yourself”.
Too much of the ‘outdoor industry’ is geared around selling people over-priced kit that is either: Over-specification, for the amount of use they will put it to; or, not good enough, because its performance is over-hyped, or made for the ‘single-use’ festivals2 market and so wears-out easily.
The point about going outdoors regularly, in all weather, and trying many different walking locations, is that you can develop the skills to use a simple set of equipment very well; and by trial and error, after a while you can evolve a ‘set of stuff’ that works well for the activities you like to undertake – from sight-seeing, to wild camping, to joining in on protest camps.
Much of the equipment I have, I have had for many years. Often it is bought in sales, to replace worn-out equipment bought in a sale some years before. For example: My 60-litre rucksack is about 12 years old (sale after 2008 Crash!); the alternative small rucksack I use for quick stripped-down days out, and in Summer, is getting on for 20 years old; my slightly torn and holey lightweight raincoat is about 10 years old.
Though the high-end, expensive equipment might be light-weight and work in all weathers (in part, because it’s made of toxic chemicals3 like Gore-Tex®), the kind of stuff you might buy from farming equipment shops, or construction industry suppliers, can be equally good and longer-lasting.
It doesn’t matter if I’m stranded at the railway station after missing the last train; or I just decide to buy food at a shop along the way and cook it while looking at the view – good equipment isn’t about the label, or how much it costs.
Good equipment is anything that allows you to be happy, comfortable, and ‘care-free’, when spending time outdoors.
1.7 kilos, for a rucksack? And yes, it’s not stylish in its colour-scheme. But it is made from dense, thick woven nylon that for over a decade has taken the abuse it’s been given on public transport, or being forced through a hedgerow in front of me (sometimes, the quickest way to clear a path).
Lightweight rucksacks tend to be made from lightweight materials – and so will not stand-up to a long life of punishing demands in all kinds of uses and weathers.
Once you get a rucksack that “fits” it doesn’t matter what it looks like (you don’t have to look at it, it’s behind you!). It’s cheaper to buy a slightly heavier-made one that will last longer, than purchase purely on the lightweight design alone.
As well as two external pockets for easy access to water bottles, the main interior compartment is divided in two. That’s important because it allows you to keep ‘damp’ wet gear and tarps in the bottom half, separate from the top where the ‘dry’ food or extra clothing is stored.
I use aluminium water bottles with a screw top. They came with a carabiner4 to clip them onto a rucksack – never use it like that as it strips the thread on the stopper.
For a short walk I might take my half-litre bottle; for an average day walk I take two 1-litre bottles, or three in Summer. When backpacking/wild camping away from ‘civilisation’ I can take up to five.
Again, metal containers are a little heavier, but if looked after they will last years. Plastic containers eventually get brittle and split, or wear around the edges as they rub against the rucksack fabric, and leak.
As the saying states, “There is no such thing as bad weather, just bad clothing”. Staying dry is not the same as staying warm; likewise, even when dry inside, being comfortable in Summer rainfall isn’t the same ‘waterproofing’ issue as in cold Winter rainfall.
Staying warm and dry is all about layers: Having a sufficiently water- or wind-proof layer; then if necessary, having a separate insulating layer beneath to keep that cold top layer away from your body.
Even when it’s not raining, a thin, wind-proof woven layer over a thin insulating layer works just as well as a thicker, and consequently hotter, wind-proof coat.
My basic base layer is the clothing I wear. That actually works for much of the time I spend outdoors. If required, on top of that, for insulation, I have a rough-woven jumper with a hood. It’s lighter-weight than the standard cotton ‘hoodie’, but just as insulating because it traps air.
The outside layer varies according to the weather; I have my ‘lightweight’ woven wind- and light rain-proof coat for Summer, or for Winter drizzle; for hard-driven or cold Winter rain, I have my latex-proofed cotton ‘heavy-duty’ rain gear (designed for use in farming – I find it’s excellent for walking in heavy weather).
What you use needs to suit your requirements and budget. Even so, by working with layers for insulation, and wind- or water-proofness, you can adapt what you have to many different types of weather.
Sometimes you don’t need to add another layer to stay warm; you’ll just overheat. What you need to do is cover-up any exposed skin. That cuts heat loss, and can be more quickly changed than a whole layer.
I have two hats: One with a wide brim, for rain or sunshine; one brimless fleecy hat for wind and cold.
I have warm water-resistant gloves, but not water proof. In cold rain I’m quite happy to stick my hands in my pockets; but if I need completely waterproof gloves, I have a couple of small plastic bags in the top pocket which I pull up past my wrist, and then bring my waterproofs down over the top (good waterproof gloves are expensive… certainly more than two small plastic bags).
When I’m out in very cold weather, -5°C or below, I put on a pair of fingerless gloves and then my usual gloves over the top. Below -12°C (when ‘frostbite’5 is a higher risk) you really need another layer, like a mitten, on top of that (likewise, two thick layers on your legs, and a good warm hat).
A big scarf is really useful. You can wrap it around the neck, or around the head, to keep the wind out. In Summer, tie around the top of the head and have it trail behind to keep the sun off your neck and shoulders.
I have a plain cotton keffiyeh6 that I’ve had for about 20 years (when the last one wore out), and I have to say that they are both the warmest and coolest item of head-wear I think I’ve had. Currently, folded three times and tied around my head, it serves as a Covid mask. I’ve even stopped carrying a triangular bandage7 in the first aid kit since I found the keffiyeh works as well.
Speaking of first aid kits, it’s a good idea to have something like that. Unless you’ve learnt how to use the stuff in a large first aid kit (burn dressings, triangular bandage, eye rinse, etc.), you really don’t need anything more than a selection of sticking plasters, and perhaps some antiseptic cream.
What most small kits neglect is an elastic bandage8. Again, there’s some important do’s and don’ts9 about their use, but if you do hurt yourself the support they give temporarily might provide enough mobility to get to help.
Admittedly though, over the years I’ve probably had to use my first aid kit more on other people than myself; and more likely on public transport than in the countryside.
Except for some hard-core primitivist-types who insist on using leaves or grass, I’ve yet to meet any serious walker who doesn’t take a toilet roll. Not a new one; one from home that’s about two-thirds used so that it isn’t as heavy and bulky.
Provided it’s double bagged to keep it dry, it’s also really good for fire-lighting too.
A small bar of soap – either a mostly used one from home, or one of those small hotel-type ones – is really useful; kept in a sealed container so it doesn’t get wet or go soft.
It’s not just that you can wash your hands before eating food outdoors. I once met someone who had fallen over in cow slurry and was in distress; the application of a little soap and water completely made their day.
Likewise a needle and thread for repairs. I use strong black nylon twine instead of cotton as that’s just as good for torn tents and rucksacks as it is for trousers (for which I have both straight and curved needles). Just like the soap, I’ve ‘rescued’ a few people by lending them a needle and thread.
Finally, I keep a long length of string in the top of the rucksack for anything that needs securing. Sometimes gates are secured with string that get so knotted it can’t be undone – in which case just cut it off to get past, then replace with a piece of your own. Over the years I’ve helped repair items from prams to rucksacks with a little string.
I’ve a fleecy blanket large enough to sleep under, or wrap around for extra warmth when sheltering under a tarp. At just 330 grams (compared to the kilo or so for a full sleeping bag) it provides a lot of warmth in a very small bulk. It also means, in the event I get stranded while travelling, I can wrap up warm for the night.
I also have a sealed mylar foil survival blanket10 – which is truly for emergencies to keep warm and dry (which is why they throw them over marathon runners and mountain rescue casualties). Once you get it out the pack it never folds away quite as well, so they’re fairly ‘single use’. The last one I had was used to shelter someone from the wind and rain in a street while waiting for an ambulance.
9. Maps, map case, compass, a whistle, and pen & paper
Within ten to fifteen miles of Banbury I don’t need a map; all the paths are in my head. I still take a map though; to help those who are lost. For example, while making the video for this post, I used my map to direct a lost couple back into town.
Ordnance survey maps come as folded paper. They also come as plastic laminates. The paper ones get soggy or tear with regular-use; the plastic ones just split down the folds with regular-use.
A map case helps – and is recommended to keep the map clean and secure. The problem is folding and unfolding the map.
I chop my paper maps into six-by-five kilometre squares, then laminate them back-to-back – to avoid the folding problem with conventional maps. It also means, rather than going to the expense of buying a whole Ordnance Survey sheet, I can print off and use just the small piece I want from one of the popular mapping sites11.
Finally, before anyone says, “but what about a map-app on your phone”: Firstly, I don’t have a mobile phone; and secondly, one of the groups I have helped the most are map-app users whose phone either runs out of power, can’t get a signal, or gets broken when in the middle of nowhere.
If you’re going to use a map, you need to know how to use a compass. I’ll produce a whole blog post on that soon.
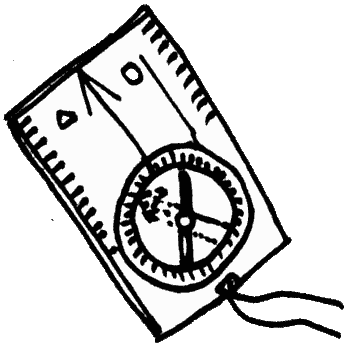
I carry two types of compass: A standard walking/orienteering compass12, which everyone should learn how to use; and a lensatic compass13, which I use for resectioning14, so that I can pinpoint myself or other objects in the landscape with greater accuracy.
I mostly use the standard compass. The lensatic compass, though, is really good for mapping any pollution or waste dumping sites I spot; or for arguing the precise location of the path with landowners.
Of course, to note down details, or directions, or a map reference, or angles, you need a pen and paper. I always keep a pen and paper in my coat pocket.
Finally, to spot things in the distance taking binoculars is a good idea. Binoculars can be heavy though, which is why monoculars15 have become more popular of late.
I always carry a monocular in my coat pocket – or rather, half of some broken binoculars I found one day – so that I can sight objects or watch wildlife more easily.
I used walking poles about a decade before they became fashionable. They’re a collapsible walking stick, which makes them easier to stow on the back of the pack, or tuck in the belt-band, when not in use.
I only really use two when backpacking, because they transfer some of the weight of the pack from the shoulder down through the arms, rather than down the spine. Mostly I just take one with me, as they’re really useful for probing the depth of mud, or puddles, or finding a footbridge in floods, or prodding a large bullock before it tries to mow you down in the middle of a field.
Knives are rightly controversial, but the lobby to criminalise all possession risks taking away an important tool for the outdoors.
What the law currently states16 is that you do not have to have a valid reason to carry a folding knife with a cutting blade less than 3”/7.6cm long. If it is longer, or if the blade locks open, then you need a good reason.
I use my knife often – from quickly trimming overgrowing bush stems and brambles, to foraging for food. I keep it sharp. That means if it were to suddenly fold on my fingers it would cut them. For that reason my short 3” gardening knife locks open.
The problem with knives outdoors isn’t possession, it’s the conflation of effectiveness with size. Many of those over-priced ‘bushcraft’ knives will never be used for the purpose intended; they’re just a fashion statement. I can get by perfectly well with my small but well-honed tool.
That is why the idea of a ‘valid reason’ is the critical part of the law. You should be able to demonstrate that you actually need the tool for the activity being undertaken – not for reasons of fashion, but because it is the most appropriate tool for the job.
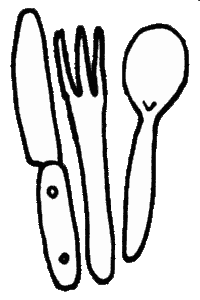
As a luxury, I also carry a knife, fork, and spoon set (though I discard the metal holder as it’s useless). Often travelling across Britain on public transport, it’s easier and cheaper to buy food from a shop than a take-away; then sit in a park or on a bench to prepare and eat it. The reason I use a heavier, metal set is that they’re much longer lasting, and nicer to use than the plastic alternative.
I always carry a torch; it’s just a habit I have. These days a small LED torch is so cheap, small and lightweight that even occasional use justifies the ease of keeping it in your pocket. Even when not walking at night, from unexpectedly dark bridges to failed underground trains, you’ll be surprised how often a torch comes in handy.
For proper ‘night-walking’ – which is a real adventure I encourage you to consider – a head-torch is essential. On the edges of a large town the levels of light pollution above are often sufficient to see by with your night vision alone; but for very dark rural locations, or walking down a road at night when car headlights will wreck your night vision, a head torch is a useful thing to have.
What I’ve covered up until this point are the standard, everyday kinds of equipment that walkers use. What I will cover next, mostly from the ‘extras’ list, are the more ‘advanced’, or ‘weird’ kinds of kit.
These are things that take practice to use well, and safely; and you shouldn’t really bother about getting them until you have seriously tried using all of the equipment described above, and decide to progress to the more ‘advanced’ level of outdoor skills.
That said, they’re great fun!
13. Camp fires and kettles
The law does not prohibit lighting fires outdoors. Until 1st April 2021, what ‘The Countryside Code’17 stated, “be careful with naked flames and cigarettes at any time of the year”. Then the new Code changed this to a contradictory, “take care with BBQs and do not light fires”. While not law, it’s an arguable case that this interferes with ancient common rights to cook over a fire.
When it comes to countryside access, the government, and in fact just about every environmental group, has no thought-out strategy to eliminate fossil fuels from outdoor activities. In fact, the means of escaping all those pressurised ‘Gaz’18 stoves, or paraffin ‘Primus’19 stoves, is laying all around.
I’ve cooked outdoors on small fires for many years; often for pure enjoyment rather than actual camping-out. A few years ago I even wrote-up my design for a small ‘stick-fire cooking grate’20 for others to build. It doesn’t require ‘wood’ to be cut; it can be fuelled just from the small sticks most often found on the ground after a storm.
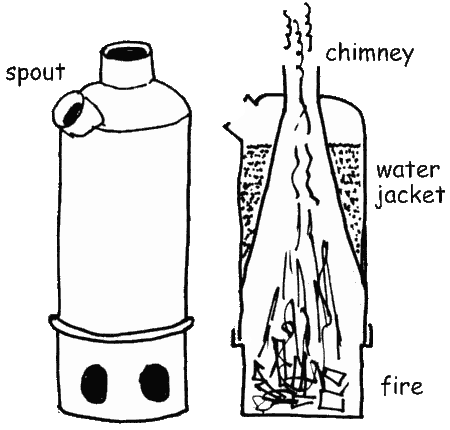
The Kelly Kettle
The ‘fire’ I most often use outdoors is my Kelly Kettle21 (shown in diagram) – again, fuelled using just the very small sticks found on the ground around trees and cut hedgerows. I have two: A large 2-litre one for group camping; and a small, 1-pint version I take on day walks. It’s well over 12 or 13 years old, and I’m amazed it has survived so well.
There are other kinds of ‘wood stove’ on the market, but a Kelly or ‘storm kettle’ works faster – boiling a pint in eight or ten minutes from getting the fire going.
Which brings me to fire-making. Matches, obviously, but if you leave them in the pack they will slowly get damp and fail to work. You can buy waterproof ‘boat matches’, but they’re very expensive. A gas lighter is far cheaper and more reliable than either.
What I prefer to use, though, is a ‘firesteel’22 – a rod of cerium-iron composite that makes hot sparks. It takes a little more effort than the more common and cheaper magnesium fire strikers23, but I’ve found them much longer lasting and less likely to break.
Of course to use that you need ‘tinder’ (these days, that phrase doesn’t have the same panache!). I carry a small metal tinderbox24, containing dried birch-bark shavings in a sealed plastic bag, as well as a wrapped-up petrochemical fire-lighter for emergencies. Most often though, I just take a few sheets of toilet paper folded tightly, and scraped to a fluffy fibre with my knife, which catches the spark from the firesteel very well (see my stick-fire grate video!25).
There’s not much point having a fire unless you have a pan to put on it.
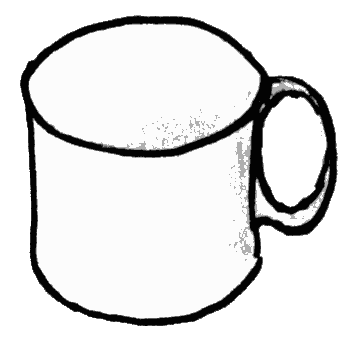
As standard I carry one stainless steel saucepan with a lid for the fire grate; and an enamel mug or bowl to eat/drink from.
With the Kelly Kettle you can boil water quickly, then take the top away and leave the saucepan/enamel bowl to keep hot on the embers of the fire below.
On a day walk I may take leftovers from the kitchen to warm through; or a block of home-cooked stew from the freezer that, by lunchtime, will have nearly defrosted. For longer days, or backpacking, two saucepans are better as you can cook a full meal.
The other great advantage of the stainless steel saucepan is that, should you come across some good leaves, nuts, or berries along the way, it makes a good container to carry them home in.
For most outings I don’t take any ‘extras’ – or at most, a small container of salt, pepper, and mixed herbs. For backpacking, and especially when working at festivals, I’ve a far more exotic collection of small containers with a total volume of about two litres; which allows me to cook anything from a flavourful rice pudding to a curry.
Cooking outdoors from raw ingredients, and foraging, are big subjects – one that I can barely scratch the surface of here.
As said above, this is way too big a subject to even begin to cover here.
Most often I carry a small ground sheet, about 1 by 1.5 metres. Big enough to sit on outdoors without getting damp; ideal for a picnic; or for the waterproof base of an emergency shelter if I need to make one.
I most often use the tarp not for camping, but to make a dry shelter for lunch. Even on dry days, in Winter it makes a great wind-break to wrap around while sitting for a rest or lunch. To make rigging a shelter easier, I carry a couple of tent pegs and a pair of guy ropes packed into a small pouch.
There are so many ways to rig a tarp; I’m sure I’ll return to this in future blog posts.
I believe that we all should help26 to keep footpaths clear of obstructions. To do this I often carry my ‘obstruction kit’ (especially after a big storm, or in the early Summer):
Firstly, a folding garden saw. It’s quite light, and is a wonderful tool to remove thin branches that fall across the path.
Secondly, secateurs, for when I need to trim back overgrown stiles or gateways to get through without injuring myself. I also carry a pair of thick gardening gloves to grasp brambles or branches without injury.
Finally, heavy-duty wire cutters; primarily for removing the barbs from barbed wire (unlawfully) strung across footpaths.
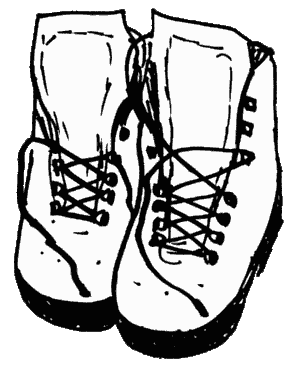
Outdoor boots come in many shapes – from wellingtons to climbing boots. What matters is that they provide enough support to keep your feet comfortable walking a long distance on roads or cross-country.
I do pay a lot for my boots (~£100-£150), but I expect to get two to three years, or just over a thousand miles of use out of them.
I prefer heavier boots because I walk through all kinds of terrain. A proper, traditional walking boot will also work as well on a dry road, as it will when full of water after walking through floods or a stream.
Gaiters are used less these days. With a low ankle-height boot, dirt, stones, and water, will easily get down inside and cause irritation. Gaiters fit around the ankle and up the shin, allowing you to walk through ploughed fields or muddy puddles without a second thought. Apart from stopping stuff getting into the boot, they stop shins and calves getting scratched or stung when walking through undergrowth.
Finally, socks. I wear two pairs: A thick woven outer sock; and a soft, smooth cotton inner. This allows the foot to flex and move inside the boot without getting blisters.
Why do I happily carry 16 kilos eight or twelve miles in a few hours? Basically, it’s a really good way to keep fit for when I want to go backpacking – when I can routinely carry anything from 24 to 30 kilos depending where I’m going, and how I’m camping along the way. Also, as I don’t drive a car; staying fit enough to travel, carrying everything I need, is an important part of living without car-based transport.
You shouldn’t try to carry heavy loads right away; you’ll hurt yourself. Carrying progressively more weight strengthens the trunk muscles, and the cartilage and connective tissues in the spine and other joints become stronger and more elastic. If your body complains (particularly back, ankles, knees & hips), then build-up the weight and distance more slowly – and take more rest.
For example, after two-and-a-half months immobile in bed at the end of 2018, I began in 2019 with just 5 kilos, working my way back to comfortably walking 12 miles; then slowly upped the weight each week until in mid-April I carried 18 kilos for 16 miles. By 1st May, I was able to undertake a three-day backpack27 across the Wessex Downs.
When I stop for a snack, or camp overnight, I expect to leave the site without any indication that I was ever there – the self-explanatory, ‘Leave No Trace’28 principle. Not because of the Country Code; or litter laws. I do it in respect for the living Earth on which I walk.
The reality is, the amount of damage I might do outdoors in a lifetime, will be more than matched by a single large farm machine in a day – from hedge strimming, to spraying chemicals, to ploughing. The land lobby, currently trying to criminalise trespass, deny this; but it is that ideological mind-set which is destroying the Earth.
‘Ordinary’ people must reforge a bond with the land. That is the only practical way we will change the current mind-set that is destroying the Earth. Spending time walking and camping, with few resources, is I think the best way to do that.